
 Register
Share your photo taking setup!
TANTIVE XI :: TANTIVE INVENTIVE - Creative with Star Wars :: Tantive Inventive :: Pictures and Image Tips
Page 1 of 1 • Share

Share your photo taking setup!
![]() by psybertech Wed May 06, 2015 10:52 pm
by psybertech Wed May 06, 2015 10:52 pm
Please feel free to show your setup and how you take your images!
_________________
"That's no moon, it's Alex's arse!"
psybertech- Sullust Samurai
- Posts : 756
Join date : 2015-02-23
Yavin Honor : 1875
Age : 51
Location : Jersey Texan :)
Focus : Leia Bespin -

Re: Share your photo taking setup!
![]() by psybertech Fri May 08, 2015 8:21 pm
by psybertech Fri May 08, 2015 8:21 pm
OK... I've been meaning to show how my images are done for a while.
I use a light tent (16x16x16) that folds up for travel. by Cowboy Studios via Amazon.
And no lights, just the sun.
Camera: Canon Powershot SD990IS 14.7MP Digital Camera with 3.7x Optical Image Stabilized Zoom (Black) (discontinued )
)
The only room for this to get good sun is on my bed.
[400]
I place the whole setup on a 20"x30" backing board from a poster frame.
When I found my distances, I marked the board with marker as starting points.
(photoshoped to add what the lines mean)
[You must be registered and logged in to see this image.]
Here's the tent:
[You must be registered and logged in to see this image.]
The Tripod aligned on the board:
[You must be registered and logged in to see this image.]
Its more of a boom style tripod (and my Canon Powershot P&S)
[You must be registered and logged in to see this image.]
Align the front edge of the tent:
[You must be registered and logged in to see this image.]
If you will notice, the back is black from the case. I need to brighten that up, so I use a couple pieces of white, thick paper to stick to the back of the tent to brighten that area back up:
[You must be registered and logged in to see this image.]
Now I add two pieces of white styrofoam to act as a riser and align on the board's marks:
[You must be registered and logged in to see this image.]
Now I use the white background material the tent came with to start the "infinity wall" (curved background):
[You must be registered and logged in to see this image.]
Next, add a 12x18" color piece of construction paper:
[You must be registered and logged in to see this image.]
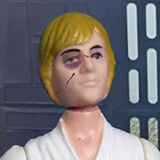
Now add the figure to the riser, about the middle, but use the LCD on the camera to center top to bottom and left to right better:
[You must be registered and logged in to see this image.]
Rough idea of what I see before shooting (the lens is about 6.5" from the tip of the lens to the figure's back)
[You must be registered and logged in to see this image.]
Closeup of LCD with details of settings:
[You must be registered and logged in to see this image.]
Now, I move in a little closer (tip of the lens is now about 4" to the back of the figure):
[You must be registered and logged in to see this image.]
Again, LCD showing settings (note, I slowed the exposures more to lighten to show COO better. My LCD is a little lighter than the actual image will be)
[You must be registered and logged in to see this image.][/400]
Final Images:
Straight from Camera #1:
[You must be registered and logged in to see this image.]
Altered in Photoshop with levels and 3px unsharp mask:
[You must be registered and logged in to see this image.]
Straight from Camera BUT CROPPED only #2:
[You must be registered and logged in to see this image.]
Croppped and Altered in Photoshop with levels and 3px unsharp mask:
[You must be registered and logged in to see this image.]
Not the best I can do. I took this quick to show my setup and it is about 2 hours later than I wold shoot this time of the year (sun moves past the corner of my house by 1PM or so).
SO there you have it.
Hope that helps or at least gives you an insight on how I do my stuff.
Setup time from storage to 1st pic is about 3 minutes and the same for tear down and re-store.
cheers!

I use a light tent (16x16x16) that folds up for travel. by Cowboy Studios via Amazon.
And no lights, just the sun.
Camera: Canon Powershot SD990IS 14.7MP Digital Camera with 3.7x Optical Image Stabilized Zoom (Black) (discontinued
The only room for this to get good sun is on my bed.
[400]
I place the whole setup on a 20"x30" backing board from a poster frame.
When I found my distances, I marked the board with marker as starting points.
(photoshoped to add what the lines mean)
[You must be registered and logged in to see this image.]
Here's the tent:
[You must be registered and logged in to see this image.]
The Tripod aligned on the board:
[You must be registered and logged in to see this image.]
Its more of a boom style tripod (and my Canon Powershot P&S)
[You must be registered and logged in to see this image.]
Align the front edge of the tent:
[You must be registered and logged in to see this image.]
If you will notice, the back is black from the case. I need to brighten that up, so I use a couple pieces of white, thick paper to stick to the back of the tent to brighten that area back up:
[You must be registered and logged in to see this image.]
Now I add two pieces of white styrofoam to act as a riser and align on the board's marks:
[You must be registered and logged in to see this image.]
Now I use the white background material the tent came with to start the "infinity wall" (curved background):
[You must be registered and logged in to see this image.]
Next, add a 12x18" color piece of construction paper:
[You must be registered and logged in to see this image.]
Now add the figure to the riser, about the middle, but use the LCD on the camera to center top to bottom and left to right better:
[You must be registered and logged in to see this image.]
Rough idea of what I see before shooting (the lens is about 6.5" from the tip of the lens to the figure's back)
[You must be registered and logged in to see this image.]
Closeup of LCD with details of settings:
[You must be registered and logged in to see this image.]
Now, I move in a little closer (tip of the lens is now about 4" to the back of the figure):
[You must be registered and logged in to see this image.]
Again, LCD showing settings (note, I slowed the exposures more to lighten to show COO better. My LCD is a little lighter than the actual image will be)
[You must be registered and logged in to see this image.][/400]
Final Images:
Straight from Camera #1:
[You must be registered and logged in to see this image.]
Altered in Photoshop with levels and 3px unsharp mask:
[You must be registered and logged in to see this image.]
Straight from Camera BUT CROPPED only #2:
[You must be registered and logged in to see this image.]
Croppped and Altered in Photoshop with levels and 3px unsharp mask:
[You must be registered and logged in to see this image.]
Not the best I can do. I took this quick to show my setup and it is about 2 hours later than I wold shoot this time of the year (sun moves past the corner of my house by 1PM or so).
SO there you have it.
Hope that helps or at least gives you an insight on how I do my stuff.
Setup time from storage to 1st pic is about 3 minutes and the same for tear down and re-store.
cheers!
_________________
"That's no moon, it's Alex's arse!"
psybertech- Sullust Samurai
- Posts : 756
Join date : 2015-02-23
Yavin Honor : 1875
Age : 51
Location : Jersey Texan :)
Focus : Leia Bespin -
Re: Share your photo taking setup!
![]() by Commander Clint Fri May 08, 2015 8:37 pm
by Commander Clint Fri May 08, 2015 8:37 pm
Awesome Jay. 
Your distance of 4" = Chris's 10 cm for shooting the COO.
Your distance of 4" = Chris's 10 cm for shooting the COO.
Commander Clint- Jedi Shogun Spirit
- Posts : 10531
Join date : 2015-02-23
Yavin Honor : 26785
Age : 54
Location : Cambridge, Ontario, Canada
Focus : Canadian Items & cardbacks, loose variants
Re: Share your photo taking setup!
![]() by psybertech Fri May 08, 2015 8:55 pm
by psybertech Fri May 08, 2015 8:55 pm
Hey Chris,
Cool! We must have similar CCD size (mine's 14MP) and focal length lenses! 
I do want to note this...
My camera's macro focus distance is spec'd out at 1.5 - 2" I believe.
When I first started taking pics, I went to that spec. Well, the focus wasn't as good as the specification led me to believe. Additionally, since I as filling up over 4000x3000 pixels with just the COO stamp, once it was rendered on screens at around 200 - 400 pixels (or even 1000), the quality was super shit.
Wolff sent me tip that said simplly, "too close " haha... I backed up 2 inches or so and have been happy with them ever since.
SO... just because your camera says it can do something, maybe it can't and always remember what the end image will be used for since most of the pixels your camera can store per image, may not be used and the moment you reduce an image size, you lose quality.
Anyway.........
Cool!
I do want to note this...
My camera's macro focus distance is spec'd out at 1.5 - 2" I believe.
When I first started taking pics, I went to that spec. Well, the focus wasn't as good as the specification led me to believe. Additionally, since I as filling up over 4000x3000 pixels with just the COO stamp, once it was rendered on screens at around 200 - 400 pixels (or even 1000), the quality was super shit.
Wolff sent me tip that said simplly, "too close
SO... just because your camera says it can do something, maybe it can't and always remember what the end image will be used for since most of the pixels your camera can store per image, may not be used and the moment you reduce an image size, you lose quality.
Anyway.........
_________________
"That's no moon, it's Alex's arse!"
psybertech- Sullust Samurai
- Posts : 756
Join date : 2015-02-23
Yavin Honor : 1875
Age : 51
Location : Jersey Texan :)
Focus : Leia Bespin -
Re: Share your photo taking setup!
![]() by chris.75 Fri May 08, 2015 9:23 pm
by chris.75 Fri May 08, 2015 9:23 pm
Thats a great guide Jay
mine is 18mp with a CMOS sensor and a Digic 4 processor,I bought it with a EF-S 18-55mm f/3.5-5.6 IS II Lens kit. The lens is pretty basic by Canons standards and I hope to upgrade to a EF-S 17-85mm f/4.0-5.6 IS USM Lens. Perhaps the missus will buy me one for my 40th
here is a link to my camera on Canon's site:
[You must be registered and logged in to see this link.]

chris.75- Tatooine Taisho
- Posts : 3310
Join date : 2015-02-19
Yavin Honor : 9996
Age : 48
Location : U.K
Focus : Darth Vader, as well as Kenner, PBP, Poch, LL, GL and other lines, basically everything vintage sw I can get my hands on!!
Re: Share your photo taking setup!
![]() by psybertech Fri May 08, 2015 9:27 pm
by psybertech Fri May 08, 2015 9:27 pm
Nice one Chris!
Seeing your pics gives me a lot to consider regarding CMOS sensors now a days.
And On Amazon now, the Powershot G16 and the 1200D with 18-55 are both $400.
I need to think... but not while drinking!
Seeing your pics gives me a lot to consider regarding CMOS sensors now a days.
And On Amazon now, the Powershot G16 and the 1200D with 18-55 are both $400.
I need to think... but not while drinking!
_________________
"That's no moon, it's Alex's arse!"
psybertech- Sullust Samurai
- Posts : 756
Join date : 2015-02-23
Yavin Honor : 1875
Age : 51
Location : Jersey Texan :)
Focus : Leia Bespin -
Re: Share your photo taking setup!
![]() by ourchickenshack Fri Dec 11, 2015 6:33 am
by ourchickenshack Fri Dec 11, 2015 6:33 am
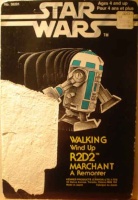
Here's my little setup , nothing fancy but being mobile helps get good light outdoors ...
Rolling Cart with plywood screwed to it :
[You must be registered and logged in to see this image.]
I went to hobby lobby and bought a 32 " x 40 something " piece of light grey Matte Board (the stuff the use to do fancy picture framed stuff) . It was $10 for a big piece of it but well worth it because it is much sturdier then poster board and still flexible enough to achieve the "Infinity Background" .
[You must be registered and logged in to see this image.]
I lined the Matte board up even with the front edge of the plywood and attached it with thumbtacks . Then basically lined it up with the top edge and attached it with thumbtacks . The size of the matte board just happened to be perfect for what I already had built out of wood so the curve ended up pretty nice .
I draped the fabric over the back and attached it with thumb tacks ...
[You must be registered and logged in to see this image.]
Starting at the top I sprayed about 12 " sections at a time with spray adhesive :
[You must be registered and logged in to see this image.]
I laid the fabric across and would just slowly smooth it out with my hands . If it wrinkles just pull it back up and smooth again - quite easy actually , once you get the hang of it .
Just keep working your way down the back , through the curve , and on out to the flat top area . Just remember to work your way down slowly , a foot at a time or so , and just spray the section your going to work on . A pretty light coating of the adhesive is all that is necessary , if you spray too heavy it will be too wet and end up soaking through the fabric and showing on the side you don't want to see .
[You must be registered and logged in to see this image.]
Trimmed the excess off with a razor blade :
[You must be registered and logged in to see this image.]
Ta Da !!
ourchickenshack- Dagobah Daimyo
- Posts : 6929
Join date : 2015-02-21
Yavin Honor : 27918
Age : 54
Location : Oklahoma
Focus : Farceur Mollification
Re: Share your photo taking setup!
![]() by arohk Fri Dec 11, 2015 7:57 am
by arohk Fri Dec 11, 2015 7:57 am
I am going to have to do that thanks for showing it.
arohk- Outer Rim Ronin
- Posts : 449
Join date : 2015-11-27
Yavin Honor : 1555
Age : 58
Location : Canada
Focus : started on a baggie collection and lil ledy
Re: Share your photo taking setup!
![]() by Commander Clint Mon Jan 11, 2016 2:18 pm
by Commander Clint Mon Jan 11, 2016 2:18 pm
Crafting foam sheet from Micheals for $1.50
[You must be registered and logged in to see this image.]
[You must be registered and logged in to see this image.]
Last edited by Commander Clint on Mon Jan 11, 2016 3:37 pm; edited 1 time in total
Commander Clint- Jedi Shogun Spirit
- Posts : 10531
Join date : 2015-02-23
Yavin Honor : 26785
Age : 54
Location : Cambridge, Ontario, Canada
Focus : Canadian Items & cardbacks, loose variants
Re: Share your photo taking setup!
![]() by Commander Clint Mon Jan 11, 2016 2:22 pm
by Commander Clint Mon Jan 11, 2016 2:22 pm
I just upgraded & up-sized my outdoor studio. 
As you can see, the picture framing matte board is a little bit lighter in colour than the crafting foam sheets.
It's a bright sunny day, so it's difficult to find the right direction for taking pictures. The back drop is facing East in the picture. Even under the patio umbrella is not much protection from the sun.
[You must be registered and logged in to see this image.]
Commander Clint- Jedi Shogun Spirit
- Posts : 10531
Join date : 2015-02-23
Yavin Honor : 26785
Age : 54
Location : Cambridge, Ontario, Canada
Focus : Canadian Items & cardbacks, loose variants
Re: Share your photo taking setup!
![]() by Commander Clint Mon Jan 11, 2016 3:04 pm
by Commander Clint Mon Jan 11, 2016 3:04 pm
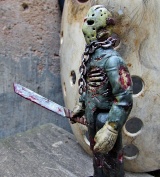
Here is what I use to take pictures of the weapons. Nothing fancy. The white sheets are just comic book cardboard backer boards.
[You must be registered and logged in to see this image.]
The white sheets are just comic book cardboard backer boards.[You must be registered and logged in to see this image.]
Commander Clint- Jedi Shogun Spirit
- Posts : 10531
Join date : 2015-02-23
Yavin Honor : 26785
Age : 54
Location : Cambridge, Ontario, Canada
Focus : Canadian Items & cardbacks, loose variants
Re: Share your photo taking setup!
![]() by chris.75 Mon Jan 11, 2016 4:26 pm
by chris.75 Mon Jan 11, 2016 4:26 pm
When taking pics of my figures, I use a light tent, during daylight hours.
It has 5 lights set up at different angles.
Using these lamps, I can take pics at night too, solely depending on the lamps as a light source.
But I do find that I get a sharper image, if I take the pics during daylight hours.
I have a desk lamp on each side of the tent, and two desk lamps shining onto the tent from above, directly onto the positioned figure.
The fifth lamp is free standing, shining directly onto the figures front. I use a light diffusing disc, balanced on top of my camera.
Using the diffuser disc softens the harshness of the free standing lamp shining on the figure, thus reducing unwanted glare or reflections.
Which after all is the whole reason for using a light tent to begin with. Some light tents come with a diffuser front screen already attatched.
Although best results are achieved during daylight hours, the main advantages of using a light tent, is that you are not so restricted by natural light.
For example, you don't have to take all your pics at the same time of day, to keep continuity in your shots.
Not being able to take shots due to bad weather/ poor natural light, is no longer an issue either.
Another benefit is as the softer, more diffused light that a light tent produces. If you were to just go outside and take a pic of your figure on a nice sunny day, you will find that there will be a lot of reflective glare and strong contrasting shadows on the figure, and its surrounding backdrop, resulting in loss of some detail.
The light bulbs, that I use for my light tent, are LED 'cool white light'. I use these because the regular bulbs, that come with the light tents, tend to cast a yellow, blue or red light, resulting in unwanted colours being reflected onto the figure. Plus the old bulbs tended to overheat and blow quite quickly.
I also mount my camera onto an adjustable tripod, and use a timer and remote shutter release, for much sharper images. Using the timer and remote shutter, means that you are not touching the camera at all, during the moment the picture is being taken, which means less camera blur.
Like Clint I use a very basic setup for photographing weapons and accessories. Just a sheet of white A4 printer paper mounted onto a homemade cardboard stand.
I prefer taking shots of weapons upright, on the vertical, as this helps to better get the item in focus, as well as reducing any shadows over the item from the camera itself. I simply attach the weapon/accessory to the paper using a very small amount of 'Blu Tak', just enough to hold the item in place, but not so big it can be seen in the photo.
I do prefer to take shots of weapons and accessories in natural light, rather than use the light tent. As shooting on such a small scale, macro photography always comes out better, with as much natural light as possible. so positioning the setup near a large window is best.
However you do not want strong, direct sunlight as this will cause strong shadows and reflective glare on the subject matter. Instead a slightly overcast day is best, or by using a light diffusing disc on sunnier days.
[300][You must be registered and logged in to see this image.][/300]
It has 5 lights set up at different angles.
Using these lamps, I can take pics at night too, solely depending on the lamps as a light source.
But I do find that I get a sharper image, if I take the pics during daylight hours.
I have a desk lamp on each side of the tent, and two desk lamps shining onto the tent from above, directly onto the positioned figure.
The fifth lamp is free standing, shining directly onto the figures front. I use a light diffusing disc, balanced on top of my camera.
Using the diffuser disc softens the harshness of the free standing lamp shining on the figure, thus reducing unwanted glare or reflections.
Which after all is the whole reason for using a light tent to begin with. Some light tents come with a diffuser front screen already attatched.
Although best results are achieved during daylight hours, the main advantages of using a light tent, is that you are not so restricted by natural light.
For example, you don't have to take all your pics at the same time of day, to keep continuity in your shots.
Not being able to take shots due to bad weather/ poor natural light, is no longer an issue either.
Another benefit is as the softer, more diffused light that a light tent produces. If you were to just go outside and take a pic of your figure on a nice sunny day, you will find that there will be a lot of reflective glare and strong contrasting shadows on the figure, and its surrounding backdrop, resulting in loss of some detail.
The light bulbs, that I use for my light tent, are LED 'cool white light'. I use these because the regular bulbs, that come with the light tents, tend to cast a yellow, blue or red light, resulting in unwanted colours being reflected onto the figure. Plus the old bulbs tended to overheat and blow quite quickly.
I also mount my camera onto an adjustable tripod, and use a timer and remote shutter release, for much sharper images. Using the timer and remote shutter, means that you are not touching the camera at all, during the moment the picture is being taken, which means less camera blur.
[300]
[You must be registered and logged in to see this image.][/300]
[You must be registered and logged in to see this image.][/300]
Like Clint I use a very basic setup for photographing weapons and accessories. Just a sheet of white A4 printer paper mounted onto a homemade cardboard stand.
I prefer taking shots of weapons upright, on the vertical, as this helps to better get the item in focus, as well as reducing any shadows over the item from the camera itself. I simply attach the weapon/accessory to the paper using a very small amount of 'Blu Tak', just enough to hold the item in place, but not so big it can be seen in the photo.
I do prefer to take shots of weapons and accessories in natural light, rather than use the light tent. As shooting on such a small scale, macro photography always comes out better, with as much natural light as possible. so positioning the setup near a large window is best.
However you do not want strong, direct sunlight as this will cause strong shadows and reflective glare on the subject matter. Instead a slightly overcast day is best, or by using a light diffusing disc on sunnier days.
[300][You must be registered and logged in to see this image.][/300]
[600][You must be registered and logged in to see this image.][/600]
chris.75- Tatooine Taisho
- Posts : 3310
Join date : 2015-02-19
Yavin Honor : 9996
Age : 48
Location : U.K
Focus : Darth Vader, as well as Kenner, PBP, Poch, LL, GL and other lines, basically everything vintage sw I can get my hands on!!
» Generic tips for taking great images
» Share your Photoshop tips!
» SHARE YOUR CHILDHOOD VINTAGE STAR WARS PHOTOS HERE!
» Like the new banner photo
» Canadian ESB Booklets for a Photo
» Share your Photoshop tips!
» SHARE YOUR CHILDHOOD VINTAGE STAR WARS PHOTOS HERE!
» Like the new banner photo
» Canadian ESB Booklets for a Photo
TANTIVE XI :: TANTIVE INVENTIVE - Creative with Star Wars :: Tantive Inventive :: Pictures and Image Tips
Page 1 of 1
Permissions in this forum:
You cannot reply to topics in this forum